Using .NET, Angular, Kubernetes, Azure/Devops, Terraform, Eventhubs and other Azure resources.

This is one part of a serie. So if you have not read the PART 0: OVERVIEW you can go there and read it to get an overview of what we will actually doing here …
Introduction
Welcome to the first part! Now we are doing our first steps to build our notifier web application. Here we learn how to create our needed infrastructure in azure with the help of terraform. In this part we only uses a local backend for terraform which is not good, because then we run into problems when we working in teams or when we want to use pipelines. This we will cover in the next part, where we will create build/release pipelines for the infrastructure. We are going not to much deep in each configuration for the resources we create. There are so many things which are very important to know when working with all this. So I strongly recommend to go deeper into it by building your projects and researching for your needs.
Please keep in mind that when you run this terraform code you have to pay for the created azure resources. So the best is to delete the created resource groups after testing it!
What resources do we need?
If we go back to the overview part, then we see that we need the following:
- Kubernetes Sevice (AKS) – managing and hosting our container.
- Container Registry – where we can push our docker images to and create container from them.
- Key Vault – to keep our azure resource secrets save.
- Event Hubs – inter service communication layer/ message broker
- Table storage – storing our notifications
- Application Insights – showing the communication in our environment, log our notifications and errors etc. from our services.
Terraform
Use Infrastructure as Code to provision and manage any cloud, infrastructure, or service
https://www.terraform.io/
For me this means that it is possible to code the infrastructure no matter for what cloud. But this does not mean, that you can use your infrastructure code and change the cloud provider without changes. It means that terraform provides most cloud providers, but resources are obviously different. However coding the infrastructure has enormous advantages which are for me:
- Put the infarstructure (as code) in a repo (versioned infrastructure)
- Easily create complete new stages with same infrastructure (dev, tst, acc, prd, etc.)
Prerequisites
Terraform
First download the terraform cli for your os (I will use windows here for all samples – but this should not really matter). Then we need to access the cli from any location in our command line program. For this I will put this downloaded executable in C:\terraform and add a new entry in the path environment variable. If it is all correct then you should get the terraform help list by typing “terraform” in your bash/terminal/command line.
Azure CLI
Furhtermore we need the Azure CLI for authenticate to our azure account. I will do this easily with PowerShell command (Adminmode is required for this process!).
Invoke-WebRequest -Uri https://aka.ms/installazurecliwindows -OutFile .\AzureCLI.msi; Start-Process msiexec.exe -Wait -ArgumentList '/I AzureCLI.msi /quiet'; rm .\AzureCLI.msiAfter installing the Azure CLI and please reopen your command line tool. Then type az. Then you should see commands from provided by the Azure CLI. Now it is time to authenticate to you azure account by typing:
az loginThe browser opens automatically and you need to enter your credentials from your Microsoft account which are connected with the Azure portal. Now you will see your azure subscriptions in your command line.
Start creating
So now we will definitely start to create something. First lets create a git repository in our azure devops project “Notifier” and name it “Infrastructure” (how to). Clone it into a folder. In my case “C:\Repos\Notifier”.
Then we need an editor for writing our terraform code. I will use VSCode with the following terraform plugin Azure Terraform, but this does not really matter, we could use a simple editor for it.
Initial Terraform configuration
All starts with the main.tf file. (When calling “terraform plan” it will use all “.tf” files in the folder where terraform will be executed.) Here we can define some base settings, resource group, etc. So let’s go and create a main.tf file in our infrastructure root directory.
# Define the required provider by terraform.
provider "azurerm" {
  features {
  }
  version = "=2.33.0"
  skip_provider_registration = "true"
}

provider "helm" {
  version = "= 2.0.2"
  kubernetes {
    host                    = azurerm_kubernetes_cluster.aks.kube_config.0.host
    client_key              = base64decode(azurerm_kubernetes_cluster.aks.kube_config.0.client_key)
    client_certificate      = base64decode(azurerm_kubernetes_cluster.aks.kube_config.0.client_certificate)
    cluster_ca_certificate  = base64decode(azurerm_kubernetes_cluster.aks.kube_config.0.cluster_ca_certificate)
  }
}

# Defines our first resource - the resource group in which we create other resources.
resource "azurerm_resource_group" "rg" {
  name     = "rg_notifier_example"
 // The resource group name in azure.
  location = "West Europe"
}
The provider we are using is the “azurerm” to handle resources in azure. (When you set the “skip_provider_registration” to false, then you need to provide these in azure – what we will not cover here.). Second we define a provider for helm for creating nginx ingress controller. Then we define a resource group which we want to create.
Then we need one additional file “backend.tf”. Technically we could paste all the code in the main.tf file, but this is not very good arranged. So let’s create it in the same directory.
terraform {
  backend "local" {
}
}
We work in this part only with a local backend, so no more are required here at the moment. This means the terraform state will be created locally. (In the next chapter we change the local to a remote backend.)
Now we can initialize our terraform and create a resource group in azure. Now we have to trigger the initialization process by calling:
terrafrom initTerraform will respond with a successful initialization message. Now we can “plan” our terraform script. The plan generates all terraform changes, adds and deletions. Terraform always uses the current state to determine the changes etc. This will not create any resource in azure! It is only a preview what will be changed when calling “apply”. So let’s check out the plan:
terraform planSo you should see the resource group as an “add”. You should not see a change or destroy in the plan. Ok then it is time to really create our first resource. This will be done by “apply”. Apply also produces a plan which can be accepted. If “yes” then we will really made the change in azure. Ok then:
terraform applyWhen we go to the azure portal, we should see our created resource group there! (Sometimes azure needs some time to finish the creation process, but this should not take long – no more than one minute.) With “terraform show” we can always take a look at our current state.
You should never change resources manually in the portal. If you do that your terraform state gets totally confused and you can damage a lot with this. So everything should be done with terraform.
Now we have all initialized, except the workspaces. In terraform we can create different workspaces and can so manage resources for different environments/stages. In our example we want limit us to use only two stages. This will be enough for demonstrating the use for it. Our application will have an “acceptance” and a “production” stage. So let’s create terraform workspaces for these two stages.
# Creates our acceptance workspace
terraform workspace new acc

# Creates our production workspace
terraform workspace new prd

# Show all worspaces (the star in the list marks the current workspace)
terraform workspace list
# Select a workspace which will be used inside the terraform code
terraform workspace select acc
Now we can take advantage of the workspaces in our terraform code. But first let’s create a folder named “settings” in our Infrastructure root folder. Inside the settings folder we create three files “prd.yaml”, “acc.yaml” and “common.yaml”. Then we add a line for the environment specific resource. One for “acc”…
resource_group_name: notifier-resource-group-acc… and one for “prd”…
resource_group_name: notifier-resource-group-prd… the common.yaml we need later to specify properties for all environments.
Then we reference the setting files in the main terraform script and merge the common and workspace specific settings to one settings. We use the “terraform.workspace” variable to load our setting file for that current selected workspace. Then we use our first setting variable for the resource group name. So we have a resource group for every environment. Here is the edited main.tf file:
# Define the required provider by terraform.
provider "azurerm" {
  features {
  }
  version = "=2.33.0"
  skip_provider_registration = "true"
}

provider "helm" {
  version = "= 2.0.2"
  kubernetes {
    host                    = azurerm_kubernetes_cluster.aks.kube_config.0.host
    client_key              = base64decode(azurerm_kubernetes_cluster.aks.kube_config.0.client_key)
    client_certificate      = base64decode(azurerm_kubernetes_cluster.aks.kube_config.0.client_certificate)
    cluster_ca_certificate  = base64decode(azurerm_kubernetes_cluster.aks.kube_config.0.cluster_ca_certificate)
  }
}

# Here we define settings which will be used when creating the resources.
locals {
  default_tfsettings = {

  }

  commonSettingsFile = "./settings/common.yaml"
  commonSettingsFileContent = fileexists(local.commonSettingsFile) ? file(local.commonSettingsFile) : "NoTFCommonSettingsFileFound: true"
  commonSettings = yamldecode(local.commonSettingsFileContent)

  workspaceSettingsFile = "./settings/${terraform.workspace}.yaml"
  workspaceSettingsFileContent = fileexists(local.workspaceSettingsFile) ? file(local.workspaceSettingsFile) : "NoTFWorkspaceSettingsFileFound: true"
  workspaceSettings = yamldecode(local.workspaceSettingsFileContent)

  settings = merge(local.default_tfsettings, local.commonSettings, local.workspaceSettings)
}

# Defines our first resource - the resource group in which we create other resources.
resource "azurerm_resource_group" "rg" {
  name     = local.settings.resource_group_name
 // The resource group name in azure.
  location = "West Europe"
}
Adding further resources
Now we have to add our resources we need for the application …
Application Insights
First we create a file named “application-insights.tf” in this we put the following code to create the resource. (Terraform will automatically detect the new .tf files.)
resource "azurerm_application_insights" "ai" {
  name                = local.settings.application_insights_name // Name of the resource defined in the settings file.
  location            = azurerm_resource_group.rg.location // Use resource group location.
  resource_group_name = azurerm_resource_group.rg.name // Use our resource group from the current workspace.
  application_type    = "other" // The type of application. We use "other" here, so it is not so specific like "web", "java", etc.
  retention_in_days   = 90 // The default retention used here.
  sampling_percentage = 100 // To get the most accurate results without so many loose of data.
}
This is very simple right? So we define here the resource where we set the name from the settings file depend on the workspace we have selected. The location and resource group name came directly from our created resource group in the main.tf before. But we definitely need to add the application insights name in the setting files.
application_insights_name: notifier-application-insights-accapplication_insights_name: notifier-application-insights-prdAfter this is all done we can call terraform plan to verify our changes und then apply to create the resource. Please make sure that you have selected the “acc” workspace. Ando not wonder when you call “plan” that the resource group resource will be added again. This is why we have applied the plan in the default workspace and not in the acc! In this part we will apply only in acc. In the next part when we create a pipeline for the infrastructure this will be done by the release!
terraform plan
terraform apply
Container Registry
Creating a container registry is also easy as with the application insights. Create a new file called “container-registry.tf” and put the following code to it. Please read the comments for more information.
resource "azurerm_container_registry" "acr" {
  name                = local.settings.application_insights_name // Name of the resource defined in the settings file.
  location            = azurerm_resource_group.rg.location // Use resource group location.
  resource_group_name = azurerm_resource_group.rg.name // Use our resource group from the current workspace.
  sku                 = "Basic" // We will use the not so expensive one for this demo.
}
Then like always add entries for the name in the setting files. But for this resource we can only use lowercase alpha numeric values, so we can not use the “-” for separating words.
container_registry_name: notifiercontainerregistryacc # Some resources can only use alphanumeric names.container_registry_name: notifiercontainerregistryprd # Some resources can only use alphanumeric names.And apply our new stuff …
terraform plan
terraform apply
Kubernetes Service (AKS)
Time for adding our k8s cluster. Create a file in the “Infrastructure” root folder (like with the others) and name it “kubernetes-cluster.tf” and put the following code into it for a basic managed k8s cluster.
resource "azurerm_kubernetes_cluster" "aks" {
  name                = local.settings.aks_name
  location            = azurerm_resource_group.rg.location
  resource_group_name = azurerm_resource_group.rg.name
  dns_prefix          = local.settings.aks_dns_prefix

  default_node_pool {
    name       = "default"
    node_count = 1
    vm_size    = "Standard_A2_v2"
  }

  identity {
    type = "SystemAssigned"
  }

  tags = {
    Environment = local.settings.aks_tag_environment
  }
}

output "client_certificate" {
  value = azurerm_kubernetes_cluster.aks.kube_config.0.client_certificate
}

output "kube_config" {
  value = azurerm_kubernetes_cluster.aks.kube_config_raw
}

resource "helm_release" "ingress" {
    name      = local.settings.ingress_name
    repository = "https://charts.bitnami.com/bitnami"
    chart      = "nginx-ingress-controller"
    set {
        name  = "rbac.create"
        value = "true"
    }
}
This is a very basic config for the cluster. Please take a look at terraform to get more infos. The vm_size defined in line 10 should be minimum “Standard_A2_v2”. You need 2 CPU’s and 4 GB RAM. I took the “Standard_A” version, because it is sufficient for testing purposes and it is to that fact a little cheaper.
At least we define a helm release ingress resource. This is our ingress controller which creates a public id and make it possible to reach the aks outside of the cluster. We use two workspace dependent settings here which we have to add in our setting files.
aks_name: notifier-aks-acc
aks_dns_prefix: notifieraksacc
aks_tag_environment: Acceptance
aks_name: notifier-aks-prd
aks_dns_prefix: notifieraksprd
aks_tag_environment: ProductionAnd again apply our new stuff … This can take some time (ca. 5 minutes). After everything worked correctly you get an output with a client certificate.
terraform plan
terraform apply
Event Hubs
For creating our event hub, we need first an event hub namespace in which our notifications event hub will be running in. For this please create a file named “eventhub-namespace.tf” and put the following code into it.
resource "azurerm_eventhub_namespace" "ehns" {
  name                      = local.settings.eventhub_namespace.name
  location                  = azurerm_resource_group.rg.location
  resource_group_name       = azurerm_resource_group.rg.name
  sku                       = "Standard"
  capacity                  = local.settings.eventhub_namespace.capacity
  auto_inflate_enabled      = true
  maximum_throughput_units  = local.settings.eventhub_namespace.maximum_throughput_units
  network_rulesets          = [{
    default_action       = "Deny"
    ip_rule              = []
    virtual_network_rule = []
  }]

  tags = {
    "creator"     = "markus herkommer"
    "environment" = terraform.workspace
  }
}
So nothing special her … We create a namespace for each workspace and use workspace settings to apply different configurations. The “sku” must be min “Standard”, but terraform will inform you about that, if you try basic :).
Before we declare the needed settings lets create our actual event hub, because there we will need to add some more settings. Now we create a file and name it “eventhub-notification.tf” and put the following code to it.
# Define the eventhub
resource "azurerm_eventhub" "notifications" {
  name                = "notifications"
  namespace_name      = azurerm_eventhub_namespace.ehns.name
  resource_group_name = azurerm_resource_group.rg.name
  partition_count     = local.settings.eventhub.notifications.partition_count
  message_retention   = local.settings.eventhub.notifications.message_retention
}

# Define eventhub consumers
resource "azurerm_eventhub_consumer_group" "notifications_notifier_appinsights" {
  name                = "appinsights"
  namespace_name      = azurerm_eventhub_namespace.ehns.name
  eventhub_name       = azurerm_eventhub.notifications.name
  resource_group_name = azurerm_resource_group.rg.name
}

resource "azurerm_eventhub_consumer_group" "notifications_notifier_email" {
  name                = "email"
  namespace_name      = azurerm_eventhub_namespace.ehns.name
  eventhub_name       = azurerm_eventhub.notifications.name
  resource_group_name = azurerm_resource_group.rg.name
}

# Define eventhub authorization rules
resource "azurerm_eventhub_authorization_rule" "notifications_notifier_send" {
  name                = "send"
  namespace_name      = azurerm_eventhub_namespace.ehns.name
  eventhub_name       = azurerm_eventhub.notifications.name
  resource_group_name = azurerm_resource_group.rg.name
  listen              = false
  send                = true
  manage              = false
}

resource "azurerm_eventhub_authorization_rule" "notifications_notifier_listen" {
  name                = "listen"
  namespace_name      = azurerm_eventhub_namespace.ehns.name
  eventhub_name       = azurerm_eventhub.notifications.name
  resource_group_name = azurerm_resource_group.rg.name
  listen              = true
  send                = false
  manage              = false
}
In the first section we create the notifications event hub. In the next section our two needed consumers. (The two notifier workers – app insights and email). And in the last part we set authorization rules for this event hub. We set a rule for sending and receiving messages. And when we come to the end for every resource we need to add our used setting variables in the workspace files.
eventhub_namespace:
    name: eventhubs-acc
    capacity: 1
    maximum_throughput_units: 10

eventhub:
    notifications:
        partition_count: 2
        message_retention: 7
eventhub_namespace:
name: eventhubs-prd
capacity: 1
maximum_throughput_units: 10
eventhub:
notifications:
partition_count: 4
message_retention: 7And I am sure you guess it what’s next to do …
terraform plan
terraform apply
Table Storage
To save the notifications we a need a storage and we want to store the data in azure table storage. For this we need a storage account resource. We could create the table in our services, or directly in terraform. For this time we will create it in the service later.
Create a file named “storage-account.tf” in the also known “Infrastructure” directory and put the following code in there:
resource "azurerm_storage_account" "sa" {
  name                     = local.settings.storage_account_name
  resource_group_name      = azurerm_resource_group.rg.name
  location                 = azurerm_resource_group.rg.location
  account_tier             = "Standard"
  account_kind             = "StorageV2"
  account_replication_type = "LRS"
}
In the first part we define the storage account and use the version 2 of the storage account here, but actually the V1 should also work. Our replication type is LRS which means, that our data will only be replicated in one region, which is totally ok for our use. The second part creates the table inside our storage account. Now we need to define the storage account names. (Here are only lowercase alphanumeric values allowed.)
storage_account_name: notifierstoreaccstorage_account_name: notifierstoreprdand again …
terraform plan
terraform apply
Key Vaults
For getting access to our resources we need connectionstrings and passwords, etc. The best place for it are the key vaults. The key vaults can be used in pipelines and in our .net core services. We should create key vaults for each service. This does not really matter here, because the secrets are nearly the same, but we want to do it in a microservice manner and separate them. So we have access control over these entries per service.
Before we start to create the key vault configurations we need to add some common settings.
tenant_id: YOUR_TENANT_ID

kv_allow:
    notifier-devs:
        object_id: CURRENT_LOGGED_IN_USER_OBJECT_ID
        secret_permissions: ["get", "list", "delete", "set", "recover", "backup", "restore"]
Your tenant you can find by “az account list”. For your the object id from your current user (The user you are logged in with az login.) you can find in the azure portal. Azure Active Directory -> Users -> YOUR USER. This is needed for the key vault access policy. We will see very soon…
Now we need to add some workspace specific settings and add the key vault names.
keyvault_webapi_name: kv-webapi-acc
keyvault_worker_appinsights_name: kv-worker-insights-acc
keyvault_worker_email_name: kv-worker-email-acc
keyvault_webapi_name: keyvault-webapi-prd
keyvault_worker_appinsights_name: keyvault-worker-appinsights-prd
keyvault_worker_email_name: keyvault-worker-email-prdAfter adding the settings we create a file named “keyvault-webapi.tf” and putting the following code to it:
# Key vault definition
resource "azurerm_key_vault" "kv_webapi" {
  name                        = local.settings.keyvault_webapi_name
  location                    = azurerm_resource_group.rg.location
  resource_group_name         = azurerm_resource_group.rg.name
  enabled_for_disk_encryption = false
  enabled_for_template_deployment = true
  tenant_id                   = local.settings.tenant_id
  soft_delete_enabled         = true
  soft_delete_retention_days  = 7
  purge_protection_enabled    = false
  sku_name = "standard"
}

# Access policy
resource "azurerm_key_vault_access_policy" "ap_webapi_admin" {
  for_each     = local.settings.kv_allow
  key_vault_id = azurerm_key_vault.kv_webapi.id

  tenant_id = local.settings.tenant_id
  object_id = each.value.object_id

  secret_permissions = each.value.secret_permissions
}

# Key vault entries
resource "azurerm_key_vault_secret" "kvs_webapi_appinsights" {
  name         = "ApplicationInsights--InstrumentationKey"
  value        = azurerm_application_insights.ai.instrumentation_key
  key_vault_id = azurerm_key_vault.kv_webapi.id
  depends_on = [azurerm_key_vault_access_policy.ap_webapi_admin]
}

resource "azurerm_key_vault_secret" "kvs_webapi_storage" {
  name         = "StorageSettings--ConnectionString"
  value        = azurerm_storage_account.sa.primary_connection_string
  key_vault_id = azurerm_key_vault.kv_webapi.id
  depends_on = [azurerm_key_vault_access_policy.ap_webapi_admin]
}

resource "azurerm_key_vault_secret" "kvs_webapi_eventhub" {
  name         = "EventHubSettings--ConnectionString"
  value        = azurerm_eventhub_authorization_rule.notifications_notifier_send.primary_connection_string
  key_vault_id = azurerm_key_vault.kv_webapi.id
  depends_on = [azurerm_key_vault_access_policy.ap_webapi_admin]
}
First we define the key vault. The second one is very important – the access policy. Here we define where has access to the key vaults. We already defined this in our common file – do you remember? And in this definition a foreach loop iterates over these settings and set access for the defined object id’s, which can be groups, users, or service connections. In the last section we create our entries for application insights, the connection string for the storage account (storage tables) and the connection string for sending messages to our notifications event hub.
Let’s go to the next key vault by creating a file named “keyvault-worker-appinsights.tf” and putting the following code to it:
# Key vault definition
resource "azurerm_key_vault" "kv_worker_appinsights" {
  name                        = local.settings.keyvault_worker_appinsights_name
  location                    = azurerm_resource_group.rg.location
  resource_group_name         = azurerm_resource_group.rg.name
  enabled_for_disk_encryption = false
  tenant_id                   = data.azurerm_client_config.cc.tenant_id
  sku_name = "standard"
}

resource "azurerm_key_vault_access_policy" "ap_worker_appinsights_admin" {
  key_vault_id = azurerm_key_vault.kv_worker_appinsights.id
  tenant_id = data.azurerm_client_config.cc.tenant_id
  object_id = data.azurerm_client_config.cc.object_id
  secret_permissions = [
    "get",
    "list",
    "set",
    "delete",
    "recover",
    "backup",
    "restore"
  ]
}

# Key vault entries
resource "azurerm_key_vault_secret" "kvs_worker_appinsights_appinsights" {
  name         = "ApplicationInsights--InstrumentationKey"
  value        = azurerm_application_insights.ai.instrumentation_key
  key_vault_id = azurerm_key_vault.kv_worker_appinsights.id
  depends_on = [azurerm_key_vault_access_policy.ap_worker_appinsights_admin]
}

resource "azurerm_key_vault_secret" "kvs_worker_appinsights_eventhub" {
  name         = "EventHubSettings--ConnectionString"
  value        = azurerm_eventhub_authorization_rule.notifications_notifier_listen.primary_connection_string
  key_vault_id = azurerm_key_vault.kv_worker_appinsights.id
  depends_on = [azurerm_key_vault_access_policy.ap_worker_appinsights_admin]
}
The definition is analog to the previous key vault. We create here an application insights and an event hub with listen connection string secret here.
Next the last one which is nearly the same except the name of the key vault. So create a file named “keyvault-worker-email.tf” and put the following code into that file:
# Key vault definition
resource "azurerm_key_vault" "kv_worker_email" {
  name                        = local.settings.keyvault_worker_email_name
  location                    = azurerm_resource_group.rg.location
  resource_group_name         = azurerm_resource_group.rg.name
  enabled_for_disk_encryption = false
  tenant_id                   = data.azurerm_client_config.cc.tenant_id
  sku_name = "standard"
}

resource "azurerm_key_vault_access_policy" "ap_worker_email_admin" {
  key_vault_id = azurerm_key_vault.kv_worker_email.id
  tenant_id = data.azurerm_client_config.cc.tenant_id
  object_id = data.azurerm_client_config.cc.object_id
  secret_permissions = [
    "get",
    "list",
    "set",
    "delete",
    "recover",
    "backup",
    "restore"
  ]
}

# Key vault entries
resource "azurerm_key_vault_secret" "kvs_worker_email_appinsights" {
  name         = "ApplicationInsights--InstrumentationKey"
  value        = azurerm_application_insights.ai.instrumentation_key
  key_vault_id = azurerm_key_vault.kv_worker_email.id
  depends_on = [azurerm_key_vault_access_policy.ap_worker_email_admin]
}

resource "azurerm_key_vault_secret" "kvs_worker_email_eventhub" {
  name         = "EventHubSettings--ConnectionString"
  value        = azurerm_eventhub_authorization_rule.notifications_notifier_listen.primary_connection_string
  key_vault_id = azurerm_key_vault.kv_worker_email.id
  depends_on = [azurerm_key_vault_access_policy.ap_worker_email_admin]
}
and for the last time in this post …
terraform plan
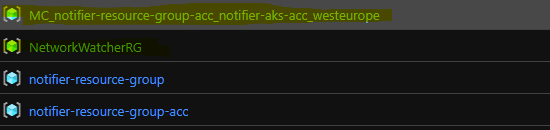
terraform applyIf everything had worked correctly the notifier-resource-group-acc in the azure portal should look like this.

Now you could check the event hubs and check, that we have our two consumers there and a shared access policy for “send” and “listen”. And make sure all secrets was written in the key vaults, but this should all be ok, else terraform has report us an error.
Please also notice two more resource groups which was created by helm for the ingress controller.
Conclusion
So you have “learned” how to start with terraform and create a bunch of resources which we will need for our scalable notifier web application. There are a lot of more options for every resource we have defined. Please take a look at terraform.
All that stuff we have written here is downloadable from the public repository: https://dev.azure.com/sternschleuder/Notifier/_git/Infrastructure?version=GBfeature%2Fpart1. Please let me know if you have any suggestions or questions.
Preview
In the next PART 1.1 we will create pipelines for our created infrastructure. This is very helpful. Then we do no more have to do “plan” and “apply” in our command line. It is then a part of the overall publishing process with all it’s benefits like, CI, approval process, stages, etc.